This tutorial will guide you on setting up SeaFile on a Windows 2012R2 server and installing an SSL certificate.
Requirements
- Windows Server 2012, 2012R2 or 2016
- Administrative account on Windows server
- Public static IP address
- DNS to resolve FQDN to public IP
- Router to forward ports 8001, 8082, 12001 to SeaFile Server
- SSL Certificate from trusted authority (www.ssls.com)
Pre-Setup
- Configure a static private IP address on the Windows server that will host SeaFile
- Install the latest Windows updates
- Disable UAC (you can enable it again after the install is completed)
- Make sure that the server has access to the Internet.
- Disable IE enhanced security configuration
- Download and install 7-Zip from www.7-zip.org
- Open ports 8001 and 8082 on your firewall and translate ( aka forward) to the SeaFile server.
Log in using an administrative account, download and install python 2.7.11 32bit, make sure to use the x32 version as x64 will NOT work properly. The installation will create a folder named c:\Pythod27 by default.
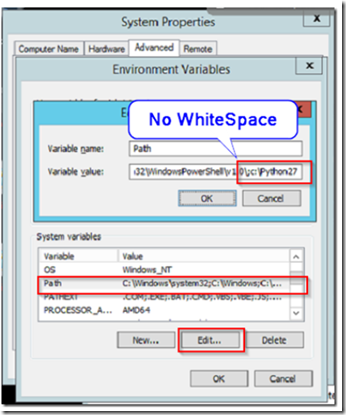
Go to system properties –> advanced tab –> environment variables.
Edit the path and add: ;c:\Python27\ to the end of the environment path.
Make sure that there is no whitespace, see example below:
Navigate to https://www.seafile.com/en/download and download SeaFile Server for Windows version 6.07.
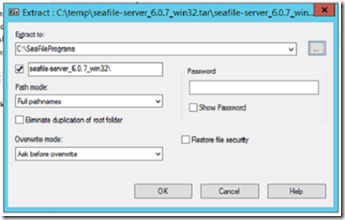
Create a folder c:\SeafileProgram and extract the SeaFile tar file using 7-Zip to that location.
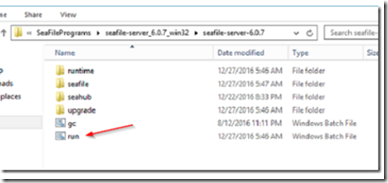
Navigate to the extracted located and execute the run.bat file.
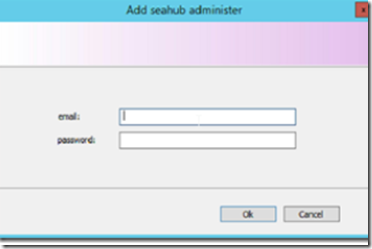
Once the installation process begins, choose a disk volume where the SeaFile folder will be installed and click next. A SeaFile server icon will appear in the icon tray. Right click on it and select add an admin account. Enter an email address and password and click OK.
Navigate to c:\Seafile-Server\conf and open seafile.conf using a text editor.
Copy and past the following text on to the editor:
[database]
type = sqlite
[network]
port = 12001
[fileserver]
port = 8082
[seahub]
port = 8001
fastcgi = false
[fileserver]
# Set maximum upload file size to 500M.
max_upload_size=500
# Set maximum download directory size to 500M.
max_download_dir_size=500
[quota]
# default user quota in GB, integer only
default = 5
We will use port 8001 for the Web UI and port 8082 for the file server. You can adjust the Web UI port and quota sizes to your own specifications but do not change the file server port 8082.
Select file-> save to save the changes.
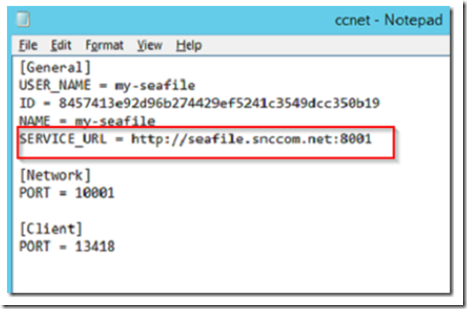
From the same directory, edit the ccnet.conf file and change the SERVICE_URL to your own FQDN.
When finished select file –> save.
Adding SMTP Mail Send
Navigate to SeaFileProgram-> SeaFile-Server-6.0.7\seahub\seagub and right click on the settings.py file. Select edit with IDLE.
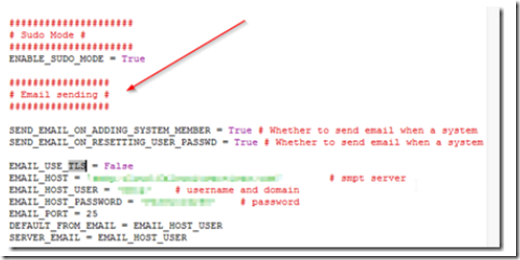
Locate the email sending section and modify according to your SMTP server requirements. You can copy/paste the lines below to add the fields to the file as shown.
EMAIL_USE_TLS = False
EMAIL_HOST = 'smtp.example.com'        # smtp server
EMAIL_HOST_USER = 'username@example.com'    # username and domain
EMAIL_HOST_PASSWORD = 'el-password'    # password
EMAIL_PORT = 25
DEFAULT_FROM_EMAIL = EMAIL_HOST_USER
SERVER_EMAIL = EMAIL_HOST_USER
If you do not have access to an SMTP server, you can add SMTP to the SeaFile server by following these steps.
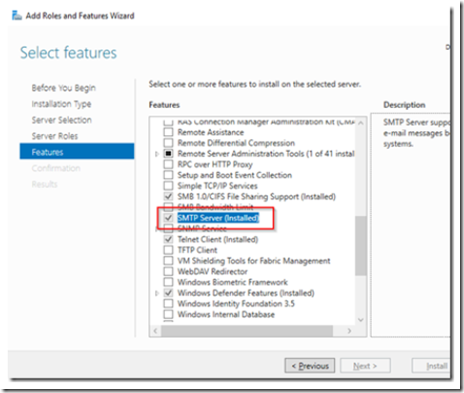
Go to the add roles and features wizard and add the SMTP server feature as shown below.
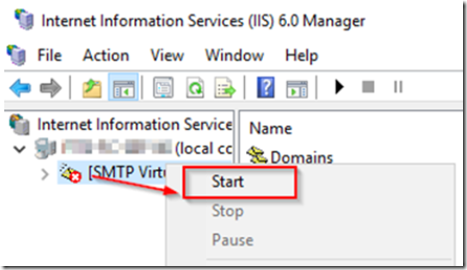
Open IIS 6 from the administrative tools menu, right click on the SMTP server and start the service.
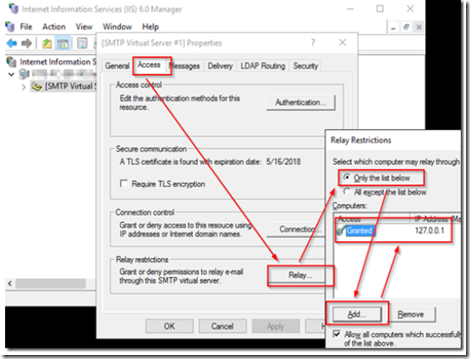
Right click on the SMTP virtual server once again and select properties. Click on the access tab and then on relay restrictions. Add 127.0.0.1 to the list of authorized relay hosts.
Go back to c:\SeaFileProgram\Seafile-Server-6.0.7\seahub\seahub and edit the settings.py file. Modify the settings as shown below:
#################
# Email sending #
#################
SEND_EMAIL_ON_ADDING_SYSTEM_MEMBER = True # Whether to send email when a system staff adding new member.
SEND_EMAIL_ON_RESETTING_USER_PASSWD = True # Whether to send email when a system staff resetting user’s password.
EMAIL_USE_TLS = False
EMAIL_HOST = ‘127.0.0.1’ # smpt server
EMAIL_HOST_USER = ‘postmaster@yourdomain.com# username and domain
EMAIL_PORT = 25
SERVER_EMAIL = ‘127.0.0.1’
DEFAULT_FROM_EMAIL = EMAIL_HOST_USER
Select file-> save when finished, then right click on the SeaFile icon located in the icon tray and Restart the SeaFile server. Also restart the SMTP
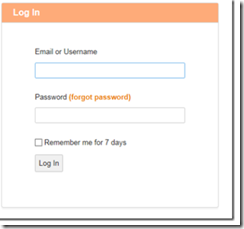
Navigate to http://yourfqdn:8001 to log in to SeaFile.
How to set up SSL Certificate on SeaFile
For this post, we are going to use a Comodo SSL certificates from SSls, so please go to www.ssls.com and create an account if you don’t already have one. We will use SSL port 4043 for this example, however you can modify the relevant settings if you wish to use the standard SSL port 443 or any other port of your choice.
To begin, create a folders on the local drive volume named c:\inetpub\https
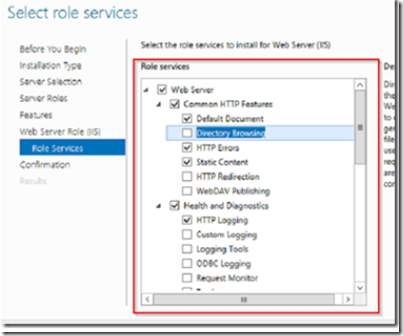
Go to add roles and features and select the IIS role. In the role services, remove directory browsing show shown below.
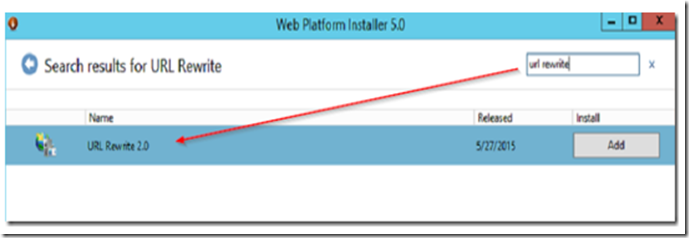
Install Microsoft web Platform Installer 5.0 (Web PI) from here. In the WebPi search box, look for URL rewrite and install URL Rewrite 2.0 as shown below.
Click on add and then on the install button to install URL Rewrite 2.0.
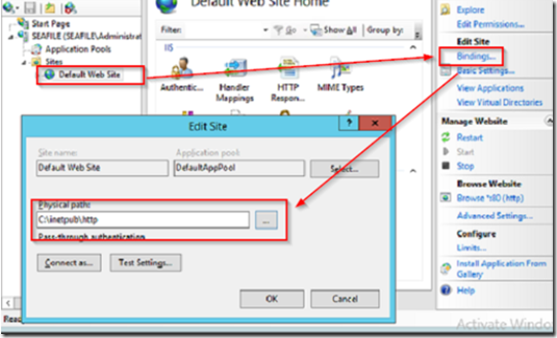
Open IIS7 and expand the server sites. Select the default Web site and click bindings. Change the physical path to c:\inetpub\http.
Click on the server and then double click on the server certificates icon.
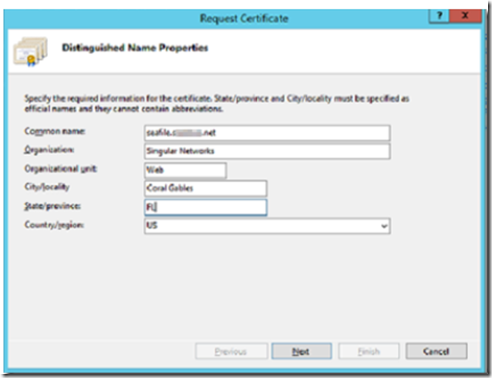
Select create new certificate and fill out the DN properties.
Select 2048 bit Microsoft RSA cryptographic provider and the save the certificate request text file.
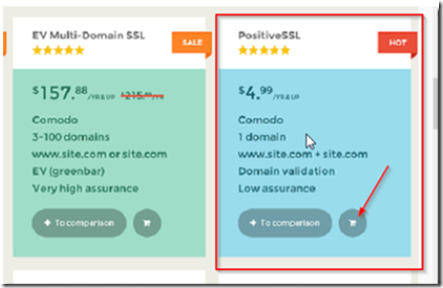
Navigate to SSLs.com and select a certificate such as the one shown below.
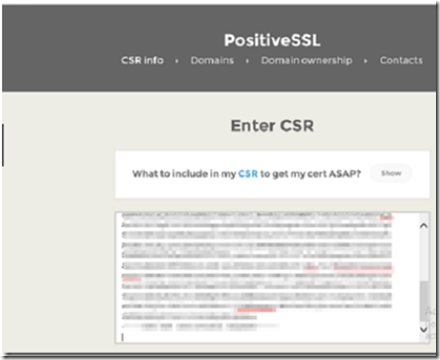
After you purchase and activate the certificate, copy/paste your CSR as shown below.
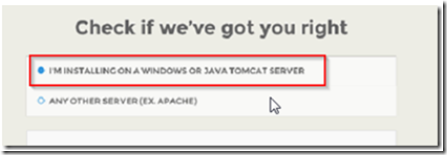
Select the first option for Windows IIS as shown below.
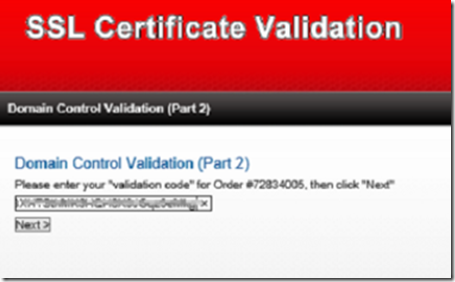
When done, submit the CSR. After you receive your confirmation email, copy and past the text code as indicated.
You will soon receive your certificate by email as an attachment. Copy/past or save the attachment on to the SeaFile server and extract the contents.
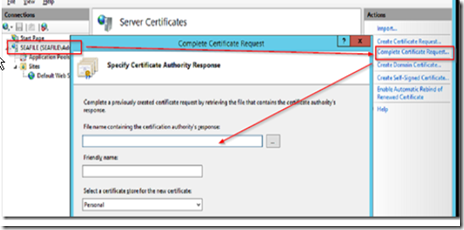
Open IIS7 and select complete certificate request.
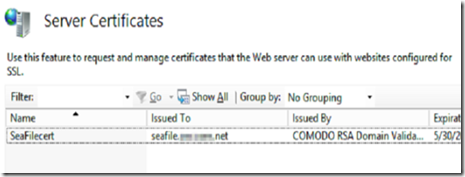
Point the file name to the extracted certificate and give the file a friendly name such as SeaFileCert.
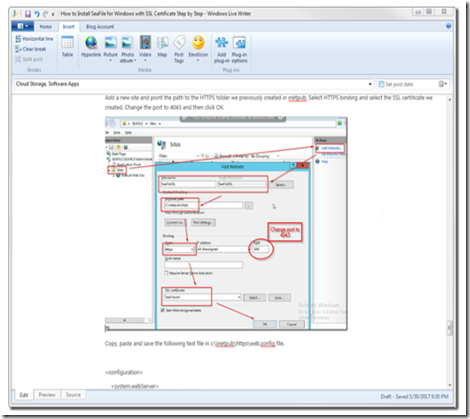
Add a new site and point the path to the HTTPS folder we previously created in inetpub. Select HTTPS binding and select the SSL certificate we created. Change the port to 4043 and then click OK.
Copy, paste and save the following text file in c:\inetpub\https\web.config file.
<configuration>
<system.webServer>
<rewrite>
<rules>
<rule name=’seafhttp’ stopProcessing=’true’>
<match url=’seafhttp/(.*)’ />
<action type=’Rewrite’ url=’http://localhost:8082/{R:1}’ appendQueryString=’false’ logRewrittenUrl=’true’ />
</rule>
<rule name=’Reverse Proxy’ patternSyntax=’ECMAScript’ stopProcessing=’true’>
<match url=’(.*)’ />
<action type=’Rewrite’ url=’http://localhost:8001/{R:1}’ logRewrittenUrl=’true’ />
</rule>
</rules>
</rewrite>
</system.webServer>
</configuration>
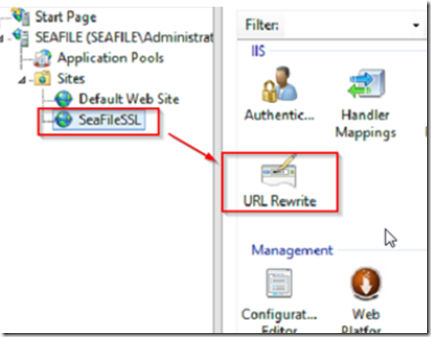
Go to your SSL site and double click on URL rewrite.
It should open a new window as shown below without any errors.
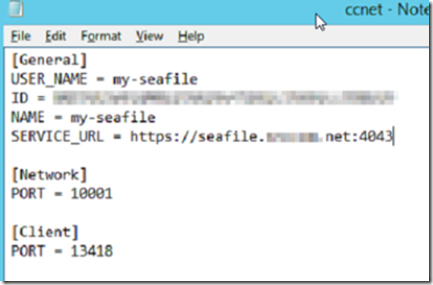
Next, go to c:\seafile-server\conf and modify the ccnet.conf file to show the correct URL.
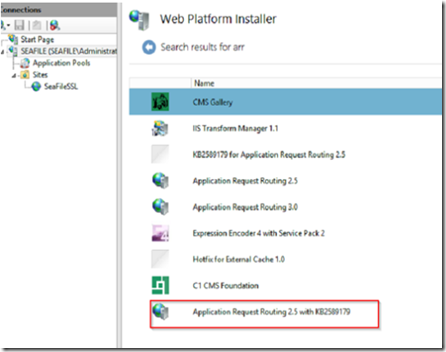
SERVICE_URL = https://www.yoururl.com:4043From the same directory, edit the seahub_settings.py file and add the line:FILE_SERVER_ROOT = 'https://www.yoururl.com/seafhttp'Go back to the Web Platform Installer and search for ARR, from the results, select and install Application Request Routing.
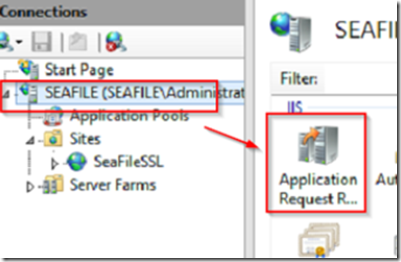
Select the IIS Server and then double click Application Request Routing.
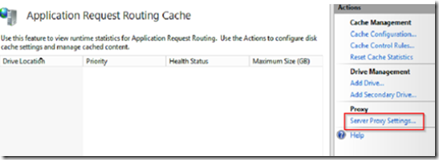
Click on the server proxy settings link and enable the proxy.
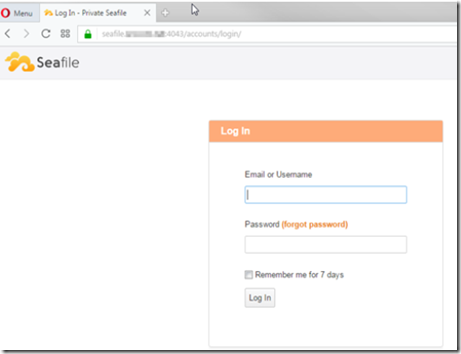
Finally restart the server so that all the settings take effect and visit your new URL for a secure version of SeaFile!

