A honeypot is a detection system that acts as a decoy, alerting system administrators when someone is snooping around the network. Ransomware operators don’t just break in and encrypt your systems — they typically spend weeks or months exploring and stealing data as part of a double-extortion strategy. Honeypots can help catch hackers as well as insider threats by providing early alerts.
This post will describe how to install the OpenCanary honeypot on Ubuntu Server 24 LTS. Be sure to read the prerequisites in the readme.md file before you begin to ensure you meet all the requirements. You will need low to intermediate Linux skills to complete this task. If you lack these skills, you may prefer to purchase a pre-configured, fully managed device from Thinkst Canary and save yourself the headache.
Although OpenCanary can emulate SQL, RDP, and other types of servers, in this post we’ll focus on SMB (Samba). You can follow these steps to create other virtual servers if you’d like to populate your network with multiple honeypots. However, I do not recommend enabling multiple protocols on a single server. Hackers are extremely smart, and if they see a server running SMB, SQL, FTP, SSH, SNMP, and more on a single IP address, they’ll either think your company is cutting every corner imaginable — or more likely, suspect it’s a honeypot.
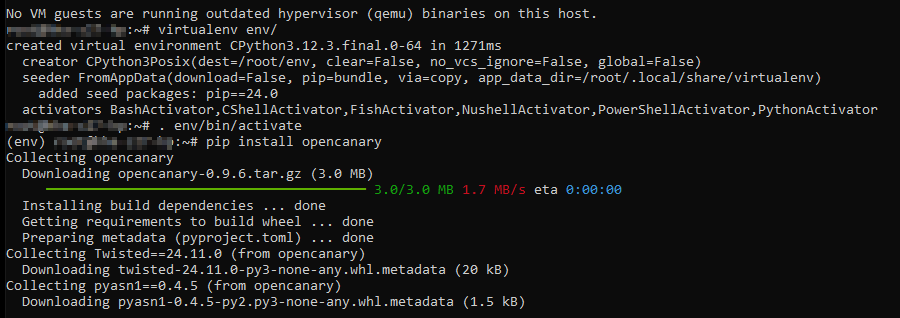
To start, set up Ubuntu Server 24.0 LTS and log in, then execute sudo -i command to log in as the root user. Going forward, the assumption is that you are logged in as root.
Install the Python development environment.
apt-get install python3-dev python3-pip python3-virtualenv python3-venv python3-scapy libssl-dev libpcap-dev
Next set up the virtual environment for Python.
virtualenv env/
Now activate the virtual environment.
. env/bin/activate
And finally install OpenCanary.
pip install opencanary
Now install SAMBA and Create a default config file. The file will be located at /etc/opencanaryd/opencanary.conf.
opencanaryd –copyconfig
Edit your OpenCanary configuration.
nano /etc/opencanaryd/opencanary.conf
Change portscan.enable to true so that you can be alerted if anybody scans the ports of the OpenCanary server, then change smb.enable to true to log and report all SAMBA access to the OpenCanary server shared folder.
Next, configure SAMBA by installing SAMBA then creating a SAMBA shared folder and a test file.
sudo apt install samba
mkdir /samba
chown $USER:$USER /samba && chmod 755 /samba && touch /samba/mysecretfile.txt
Edit the SAMBA config file.
nano /etc/samba/smb.conf
Change the following attributes.
[global]
workgroup = WORKGROUP
server string = NBDocs
netbios name = NAS
dns proxy = no
log file = /var/log/samba/log.all
log level = 0
max log size = 100
panic action = /usr/share/samba/panic-action %d
server role = standalone
passdb backend = tdbsam
obey pam restrictions = yes
unix password sync = no
map to guest = bad user
usershare allow guests = yes
load printers = no
vfs object = full_audit
full_audit:prefix = %U|%I|%i|%m|%S|%L|%R|%a|%T|%D
full_audit:success = flistxattr
full_audit:failure = none
full_audit:facility = local7
full_audit:priority = notice
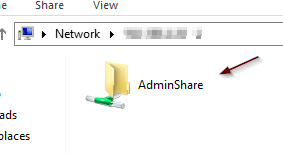
Copy and paste the text below into the section below ==== Share Definitions ======
[AdminShare]
comment = All the stuff!
path = /samba
guest ok = yes
read only = yes
browseable = yes
Exit nano and save, then restart SMB services.
smbcontrol all reload-config && sudo systemctl restart smbd && sudo systemctl restart nmbd
Edit your firewall to allow Samba if necessary.
sudo ufw allow samba
Navigate to the server’s IP address to make sure that you can see your SMB shares.
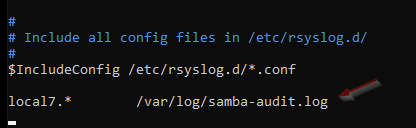
Edit rsyslogd configuration.
nano /etc/rsyslog.conf
Add the following line to the end of the file.
local7.* /var/log/samba-audit.log
Create an audit log file, set the permissions and restart the service.
touch /var/log/samba-audit.log && chown syslog:adm /var/log/samba-audit.log && systemctl restart rsyslog
Edit the opencanary.conf file.
nano /etc/opencanaryd/opencanary.conf
Make the following changes:
change smb.enabled from false to true.
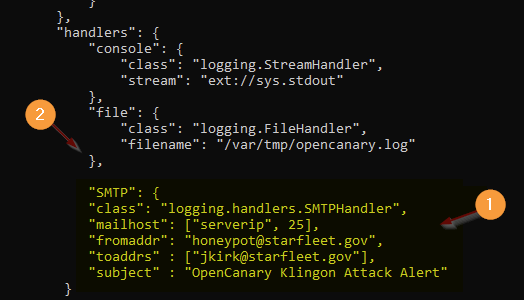
Add an SMTP server to send alerts making the necessary adjustments to the items in bold (obviously).
“SMTP”: {
“class”: “logging.handlers.SMTPHandler”,
“mailhost”: [“10.10.10.10”, 25],
“fromaddr”: “honeypot@starfleet.gov”,
“toaddrs” : [“jkirk@starfleet.gov”],
“subject” : “OpenCanary Klingon Attack Alert”
}
Important! Add the “SMTP” compound statement code after “file” (see #1 below) and inset a comma after the bracket that ends the “file” compound statement (see # 2 below).
Adding Content to OpenCanary
It’s important to add some content to the SMB folder but the content should be either encrypted or password protected. You don’t want a hacker to open a file called passwords.xls and see nothing because that will tip him/her off about the honeypot.
Here are some options:
Create a spreadsheet with several lines and then password protect it so it’s locked.
Use a program like Faker to create fake documents and ask ChatGPT to write a script for it based on parameters that you provide, like data ranges, bank names, etc.
Create all your fake content and place it on C:\honeypot in your Windows PC then upload it to the SMB file share using the pscp command utility.
- From the Linux server, change the folder permissions: chmod 777 /samba
- From Windows PC, upload the fake contents: scp c:\honeypot*.* user@10.10.10.10:/samba
- From the Linux server, change the permissions back to owner write only: chmod 755 /samba
Setting up OpenCanary to Start Automatically
For the pièce de résistance, we are going to set up OpenCanary to start automatically when the server reboots.
Use the mkdir command to create a folder named startup in the root.
cd /root
mkdir startup
Inside the folder create a file named startup.sh using nano or your preferred editor.
cd startup
nano startup.sh
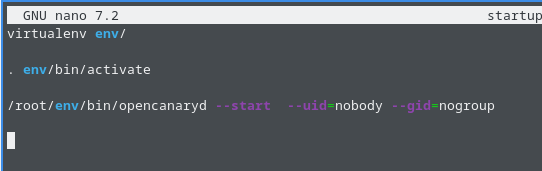
Edit the startup.sh file to include the following lines:
virtualenv env/
. env/bin/activate
/root/env/bin/opencanaryd –start –uid=nobody –gid=nogroup
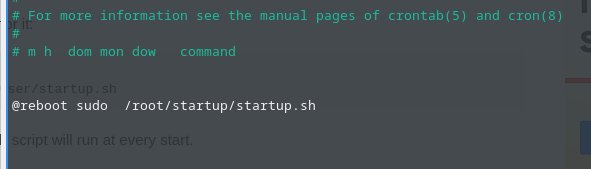
Save the file, then create a Cron task:
crontab -e
Edit the Cron file using nano or your preferred editor and add the following line as depicted below:
@reboot sudo /root/startup/startup.sh
Save the file and exit. Grant it execute permission:
chmod +x /root/startup/startup.sh
Finally, restart the OpenCanary server and test it by opening the UNC path and accessing the files we previously created. You should get an email alert from the OpenCanary server letting you know that the SMB shared folder has been accessed.
If the system does not work, double check your settings and/or visit the OpenCanary github page for troubleshooting tips.