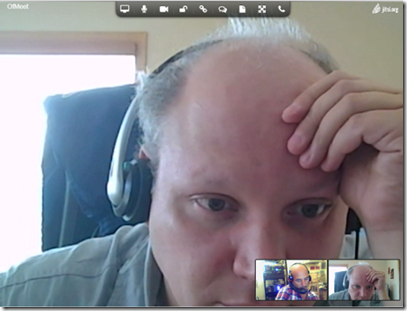
The following instruction will show you how to set up a videoconferencing server using Windows Server 2003 (it also works with 2008) and Open Source products from Ignite and Jitsi.
Here’s what you will need:
- Windows Server 2003 or 2008 Server
- A Router or Firewall (we assume you will use a Sonicwall TZ-215 in for this example)
- A Static Public IP Address
- Knowledge of Windows Server
- Knowledge of Routing and Firewall Functionality
- Knowledge of DNS Functionality
For this example, we are going to assume that you currently have a working LAN using a Sonicwall or similar router and NAT. Just like VoIP, Videoconferencing protocols do not play nicely with NAT on both ends of the connections. Since most client endpoints will be behind a NAT, it’s best to avoid NAT at the server. For this reason, we are going to set up a network card with a Public IP on the videoconference server and have it sit behind a firewall so that only the necessary ports are exposed. If you are not familiar with this type of setup on Sonicwall routers, here’s some information about extending a WAN subnet to the DMZ using transparent mode.
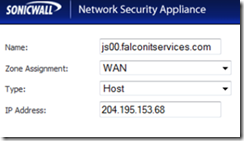
First, let’s create a network object on the router with the public IP address that we are going to use. On your Sonicwall router, select network –> address objects –> add.
Give your object a friendly name, select WAN zone assignment, host as the type and enter the public IP that you will use for your videoconference server. Note: It must be in the same subnet as your Primary WAN IP.
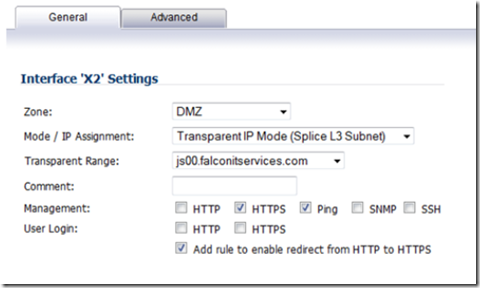
Select network –> interfaces and click to configure the X2 interface.
Select DMZ zone type, transparent mode and finally, the IP address object we recently created as the transparent range.
This will bridge the video server’s IP address to the DMZ zone where it can be firewalled.
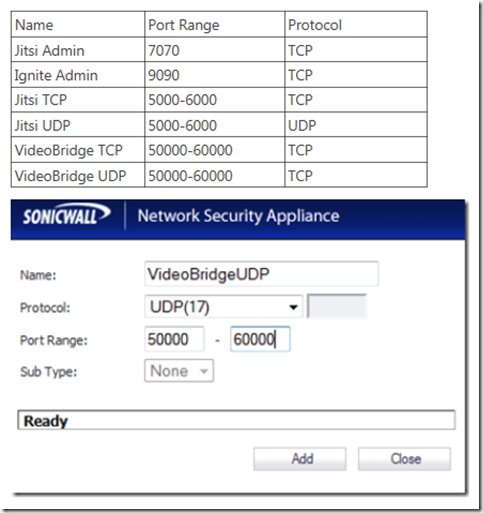
Now, go to network –> services –> add and create the following service ports:
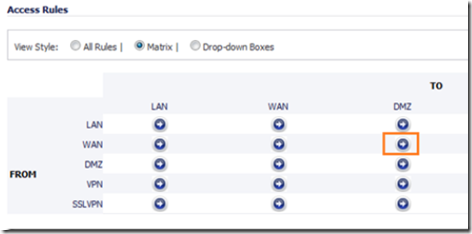
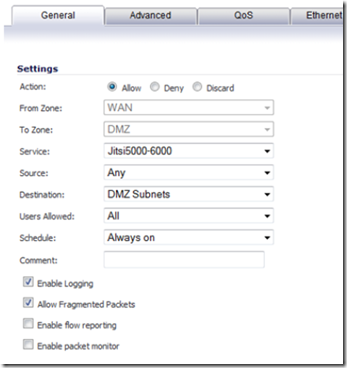
When finished, go to Firewall and select the matrix view. Click on the from WAN to DMZ firewall rule.
Click on the add button to create a new rule.
Create a rule for each service port as shown above in order to open those ports on the firewall and allow traffic through. You can also assign QOS to the JitsiVideo bridge ports via the QOS tab (optional). You should allow fragmented packets to traverse.
Finally, connect an Ethernet cable from the X2 port on the Sonicwall router to the NIC interface on the server that will host the OpenFire XMPP server. Configure your server’s NIC with the Public IP address that we used for the X2 Interface, as well as a subnet mask, default gateway and DNS server IP address.
Open Fire – Open Fire is an XMPP Server. It is the platform that Jitsi Videobridge will run on. It’s stable, secure and free! You can download it here. Install OpenFire on your videoconferencing server. It’s pretty straight forward and you can find installation instructions here.
Note: Make sure that your Windows Server firewall is turned OFF!
Next, let’s create a FQDN to access the videoconferencing server. Open your DNS Zone and create an A record such as vidconf.yourdomain.com that points to your videoconferencing server’s IP address. Here’s how to edit DNS zone files in Windows or with a Godaddy DNS hosted account.
Once that’s configured, you can access the videoconference server’s WebUI by pointing your browser to http://vidconf.yourdomain.com:9090.
Click on Plugins –> available plugins and click on the + button next to Jitsi Video Bridge in order to install the Videobridge plugin.
Once it’s successfully installed, navigate to server –> server settings –> registrations & login and make sure that anonymous login is enabled. If it is disabled, the Jitsi Videobridge will not work properly.
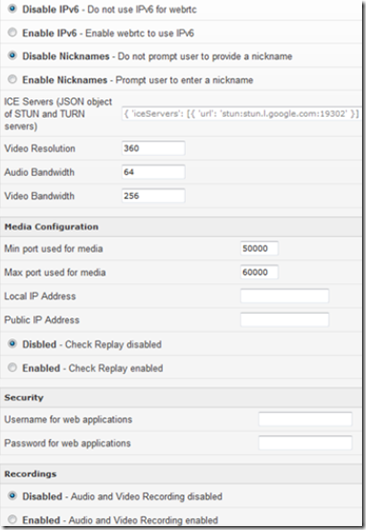
Next, go to server –> Jitsi VideoBridge. The screenshot below is from Jitsi VideoBridge V1.3.1
IPV6: Disable IPV6
STUN: We are not using STUN since we are not using NAT.
Audio Video Bandwidth: You can adjust these to get optimal settings. I use 64 Audio and 512 video.
Video Resolution: You can leave this as the default 720 or lower it to 360, both look pretty darn good to me.
Media Configuration: Min Port 50000 and max port 60000
Security: If you leave this part blank, anonymous users can create a conference room.You don’t want the FBI knocking on your door because some criminal organization has been using your video server to communicate. For this reason, I recommend that you create a user name and password (both are case sensitive).
When finished, click Save.
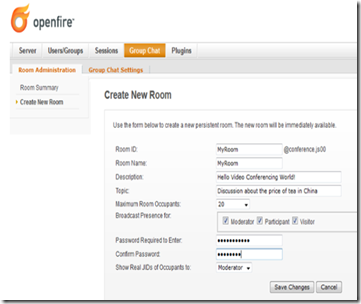
To create a chat room, go to group chat –> create new room.
Enter the settings as shown above and click on the save button. You are now ready to access the video conference room!
How to Access the Video Conference Room
To access the video conference room, the client endpoints must have the following:
- Google Chrome Browser
- Webcam
- Microphone and Speakers
Open Google Chrome and browse to the following site:
http://videoconf.yourdomain.com:7070/jitsi/apps/ofmeet/?r=MyRoom
Change the name after the r= to whatever you named your room, remember it’s case sensitive. To invite attendees, simply e-mail them the URL.
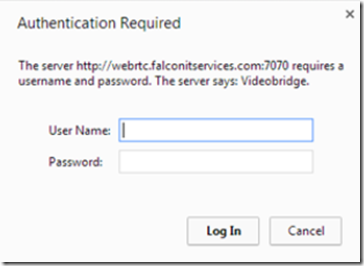
When prompted, enter the user name and password that you created in the Videobridge security page.
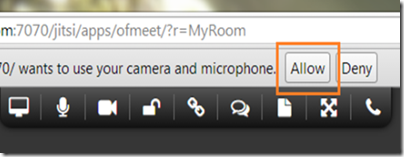
When prompted, allow the browser and application to access your microphone and camera.
Note: If you receive the message: This service only works with Chrome, make sure that you have your Webcam, microphone and speakers plugged in and functioning properly. If your Web camera is not working or if it is not connected, you will receive the aforementioned error.
Tips and Tricks to Using the Jitsi Videobridge Successfully
- Make sure that your camera, microphone and speakers are connected before you open the browser and connect to the Jitsi Videobridge. If the Videobridge does not sense your Webcam, it will display the error: This service only works with Chrome.
- Make sure that you use Google Chrome to access the Vdeobridge. Jitsi Videobridge only works with Google Chrome.
- Make sure that the background noise is minimal. Aside from disrupting the meeting, background noise can clutter the data channel and cause voice and video frame delay.
- Make sure that there is no audio feedback effect. Feedback can be caused by your microphone and speakers being too close or your speakers being too loud. It can also be caused by two participants who have speakers/microphones and who are sitting within close proximity. For this reason, a dual headset is highly recommended over the traditional speaker/microphone.
- Although you can use traditional speaker/microphone, a videoconferencing headset is highly recommended. This minimizes background noise and feedback caused by speakers feeding sound back into the microphone . Excessive feedback can cause the videoconference room to freeze calls and drop participants.

