In this post, I am going to cover migrating a DHCP server from one Windows server to another, while minimally disrupting users. This article assumes a simple, flat network with a single subnet. Your network may vary but the underlying principle remains the same so make adjustments accordingly. This also assumes that you do not have filters and DHCP options. If you do, follow this guide instead.
Configuring the Source Server
The ‘source’ will be the existing DHCP server whereas the ‘target’ will refer to the newly created DHCP server.
To begin, open the DHCP MMC in the source server and take note of the following:
DHCP Scope Range (the range of IP addresses)
DNS Servers
The images below related to the source server’s DHCP settings.

In the image above, the DHCP range is set to start at 192.168.0.50 and end at 192.168.0.150.

The current addresses leases range from 192.168.0.53 to 192.168.0.66.
Since the scope lease size is much larger than the number of devices on the network, it will make our life easier. We will start by reducing the scope lease size from 100 addresses to 50 addresses by reducing the range.
Right click on scope and select properties, then reduce the IP address range according to fit the specific needs of your network.
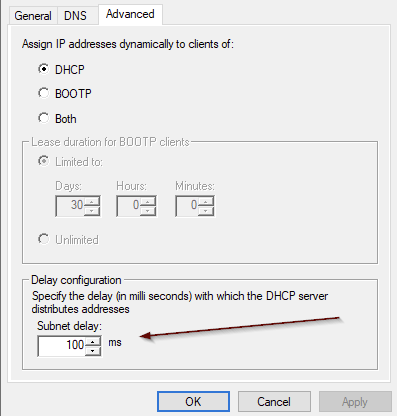
Next, click on the advanced tab and add a delay of 100-500ms. This will cause DHCP offer to be delayed, allowing another DHCP server time to provide it’s own DHCP offer to DHCP clients.
Configuring the Target Server
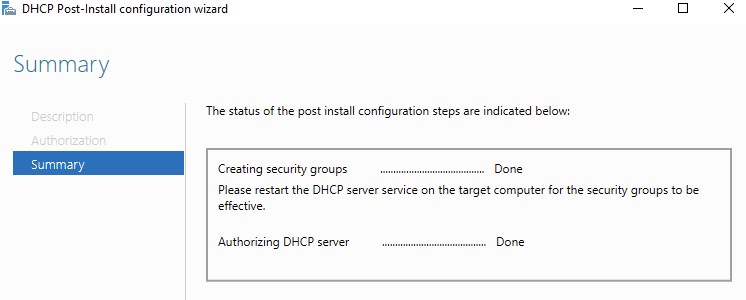
Install DHCP service on the target server and make sure to authorize the DHCP service during the post-installation configuration wizard.
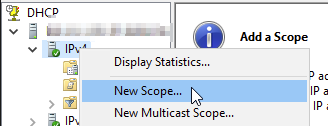
On the target DHCP server, right click on IPV4 and select new scope.
Configure the DHCP scope range using the remainder of the addresses that you removed from the source server.

In our example, the source server’s original scope range was 192.168.0.50-192.168.0.150 and we reduced to to 192.168.0.50-192.168.0.99. The target server’s scope can be set to complete the original scope by adding 192.168.0.100-192.168.0.150. This will give our new DHCP server a range of 50 IP addresses withing the range of the original scope, yet outside the newly changed DHCP scope range of the source server.
Make sure to enter the correct DNS server settings and finally, activate the scope. Now just start monitoring your address leases, you should see the network devices start to move from the source to the target DHCP server. Once all of the devices have been moved, you can disable and uninstall the source DHCP server, the increase the size of the DHCP scope range on the target DHCP server.
By default, the DHCP lease duration is 8 days. So that you don’t have to wait that long for the source DHCP server to release it’s addresses, go to the source DHCP server and right click on scope, then select properties. In the general tab, you have the option of reducing the DHCP lease duration in order to speed up the process of moving the DHCP enabled devices from the source to the target server.
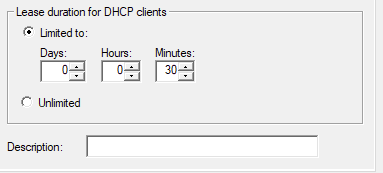
In the image above, we have reduced the DHCP lease duration to 30 minutes. This means that the devices will release their IP address and attempt to renew them every half hour. This will cause the devices to move to the target server’s DHCP more quickly.