Configuring Exchange 2013 to relay for an MFC printer or an application server is pretty straight forward. Simply follow these instructions:
Open Exchange 2013 ECP (Exchange Control Panel) and log in as an administrator.
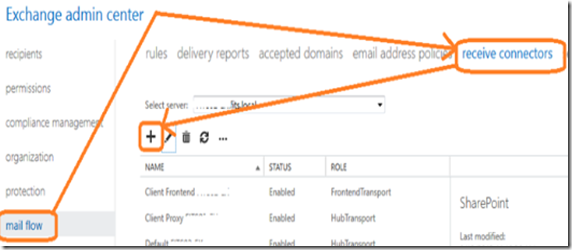
Open mail flow –> receive connectors and click on the add button.
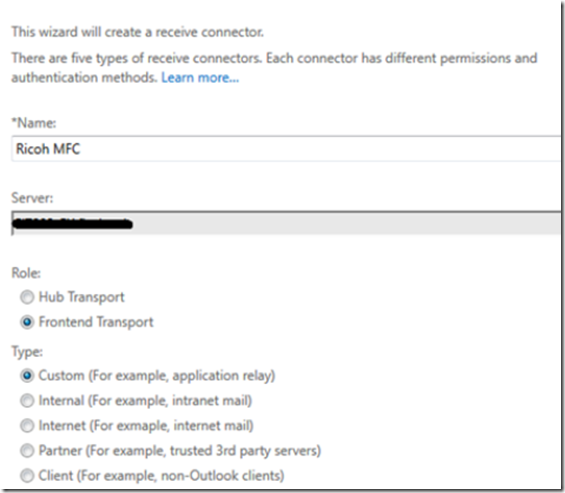
In the new receive connector window, give your connector a friendly name, select the server then choose frontend transport and custom type connector as shown below. When finished, click next.
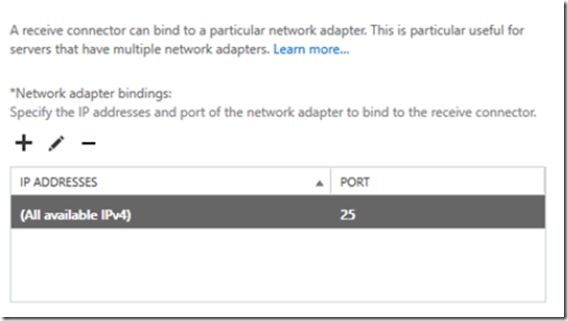
Select the IP address and port that the connector will listen on and then click next.
Remove the IP address range 0.0.0.0-255.255.255.255 from the range of remote IP addresses by highlighting it and clicking on the delete icon.
After it has been deleted, click on the add icon and add the IP address of the device or server that you want to allow relay for.
When you are done, click save then finish. Next, highlight the newly created receive connector and click on the edit icon.
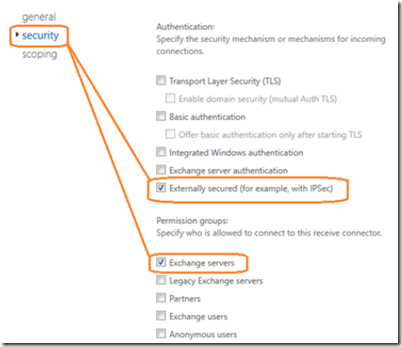
In the security settings, select externally secured authentication and exchange servers in the permission groups.
Click save and you are finished.


