DFS or Distributed File System allows system managers to amalgamate shared folders that are spread across multiple servers. DFS-R (replication) is a function of DFS that replicates data across multiple file servers for redundancy. Both are very useful, especially in enterprise computing where huge amounts of data is spread across servers and office branches.
What you will need in order to follow along in our example:
- Two or more Windows Servers 2008R2 or higher
- Servers must be joined to a domain
To install DFS, select a server that will be the DFS host. The DFS host server will host the DFS namespace, a UNC path that will be used to access the combined DFS folders.
We will need to add the DFS role to the DFS host server as well as to any other member servers that will have DFS folders or replicating folders.
From the DFS host, open the Server manager and click Manage > Add Roles and Features.
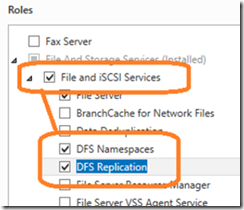
Expand File and iSCSI Services and select both the DFS Namespaces and the DFS Replication services.
Click next twice then finish to complete the installation. After the installation is complete, you will notice there is a DFS Management icon in your server’s Administrative Tools folder. Double click on this icon to open the DFS Management MMC.
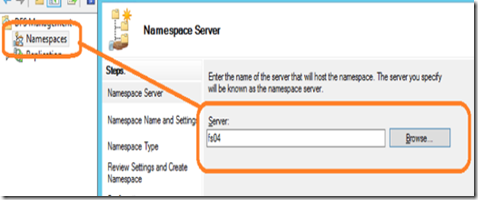
In the DFS Management console, right click on Namespaces and select new namespace. In the New Namespace Wizard, select the server that will host the namespace (the DFS server) and click next to continue.
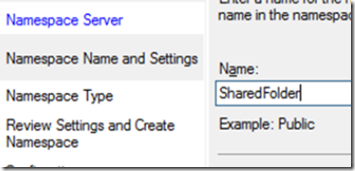
Give your DFS and easy to understand namespace and click next.
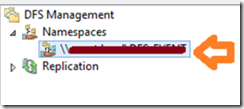
The next step asks whether you want to use a domain based namespace or a stand alone namespace. Select domain-name based DFS namespace and click next, then create. Once finished, you will see the newly created namespace in the namespace section of the DFS Manager along with its UNC path. This is the path you will use to access the DFS share.
Now that we have create the namespace, it’s time to add some folders. For our scenario, let’s say that we have two servers:
- Server 1 (EX02) has two shared folders: Admin and Images
- Server 2 (FS04) has 1 shared folder: Videos
Normally, you would need to map each folder to a drive letter. In DFS, you can access multiple shared folders using a single drive letter. Let’s add these three folders to our DFS namespace.
Right click on the DFS namespace and select new folder.
In the new folder window, create a folder named admin, then click on the add button and locate the admin folder on EX02. When finished, click OK.
Repeat the process to add the other shared folders.
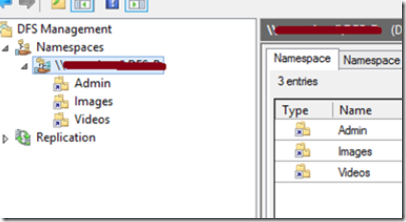
Once finished, your namespace will look similar to this:
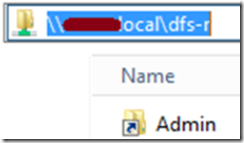
Open a browser and type the UNC path of your DFS namespace and voila! All three folders appear in a single share! You can map the namespace to a drive letter just as you would a regular file share.
Replicating Folders in Server 2012 DFS-R
Now we are going to get to the best part: DFS-R file and folder replication. Let’s say you need to implement fault tolerance because the boss would not be very happy if one of the servers went down and it took you a couple of hours to get it back working. With DFS-R, the files will still be accessible even if one of the file servers goes down!
By replicating folders, we ensure that the data is synchronized between server 1 and server 2 (in real time). DFS-R will synchronize data in the admin folder between the two servers. When both servers are healthy, DFS-R will load balance between the two servers to improve data read/write access. If one of the servers goes down, DFS-R will automatically redirect all traffic to the healthy server.
Remember the admin folder that was located in server 1? We are going to replicate it to server 2. By replicating the Admin folder between both server, we are going to create this type of redundancy.
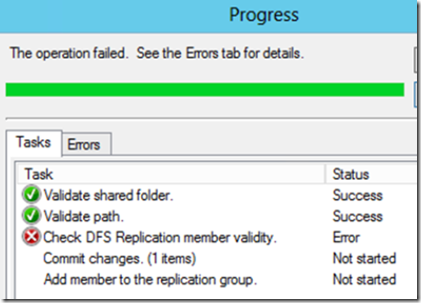
Note: Before attempting to add a replica member, make sure that both the host DFS server and all of the replicating member servers have the DFS Replication role installed. If the DFS Replication role is not installed, you will receive the following error:
The operation failed. Check DFS Replication member validity.
To install DFS Replication on the member, go to add new roles and select DFS Replication from file and storage –> file and iSCSI services.
Once you have installed the DFS Replication service on the replicating member servers, proceed to add targets to the DFS folders.
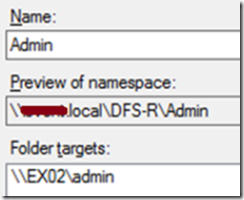
In the DFS Management console, double click on the admin folder to view its path. As you can see from the image below, it’s located at \\ex02\admin. Log in to server 2 and create a folder named admin as well.
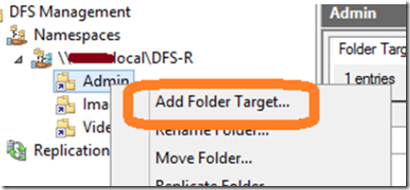
Once you have done this, right click on the admin folder and select add folder target.
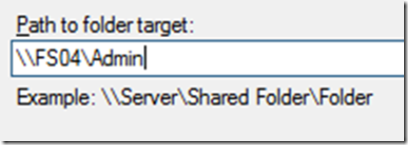
Enter the UNC path of the admin folder located on the second server and click OK.
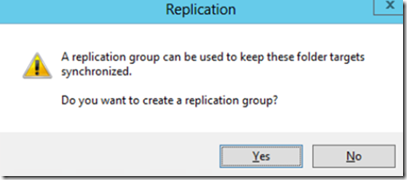
You will be prompted to create a replication group. Click yes.
Follow the wizard to configure the replication parameters.
- Primary Member: This is the server that has the initial copy of the files you want to replicate.
- Topology: This dictates in what fashion the replication will occur.
- Bandwidth and Schedule: How much bandwidth to allocate and when to synchronize.
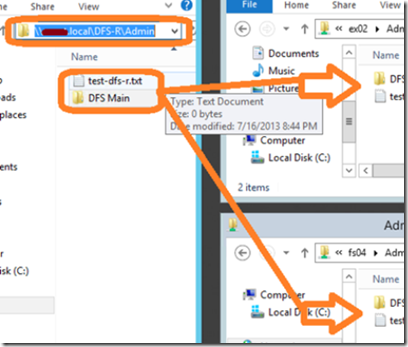
Once you have finished, click create. Any file that you create, modify or delete when using the namespace UNC path will be almost immediately copied to both replicating folders! You have just created shared folder redundancy!
