In this post I will show you how to
- Set up an RSS Feed in SharePoint
- Fix common error: “The requested RSS feed could not be displayed. Please verify the settings and URL for this feed.”
- Import SSL certificates into SharePoint
Adding an RSS Feed into a SharePoint Page
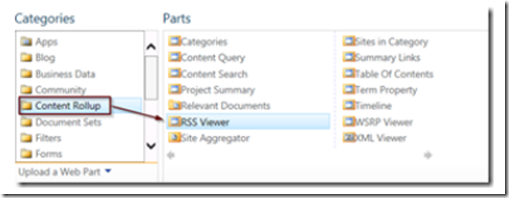
To add an RSS feed to SharePoint, open a Sharepoint page, add an RSS Web part from Content Rollup category as shown below.
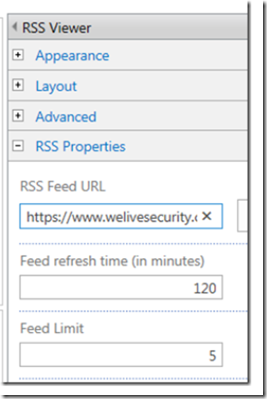
Click to open the tool pane and set the RSS URL.
Enter the feed URL including the https:// prefix. Note: If you still have trouble viewing the feed, make sure there is no trailing white space before or after the URL if you have copied and pasted.
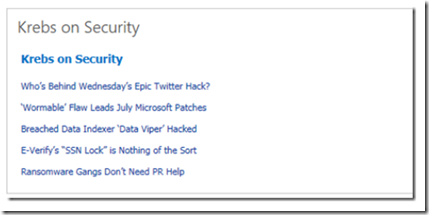
Your RSS page should now display properly.
Fixing the Error: The requested RSS feed could not be displayed. Please Verify the Settings and URL for this Feed
If you have tried to set up an RSS feed in Sharepoint and have received the error: “The requested RSS feed could not be displayed. Please verify the settings and URL for this feed.” it may be caused by trailing URL whitespace or the lack of trailing forward slash.
- Check the RSS URL for trailing whitespace and remove it
- Check that the HTTPS:// prefix is included in the RSS URL
- Make sure there is a trailing forward slash at the ned of the URL
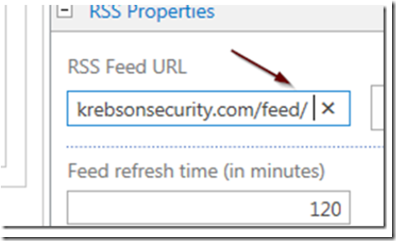
Move your cursor to the end of the URL and use the right arrow key to try to move to the right of the last letter. If you can move, then you have trailing whitespace in the URL from the copy/paste operation. Remove any whitespace and make sure that the RSS feed URL send with a forward slash “/” as shown below. Not having the slash in place can prevent the RSS for working.
Importing and SSL Certiciate into SharePoint
If you got here because you were interested in importing an SSL certificate, you can find the information below. Please noe that as long as you are displaying an RSS feed that’s using a publicly trusted certificate, you do not need to import it into SharePoint.
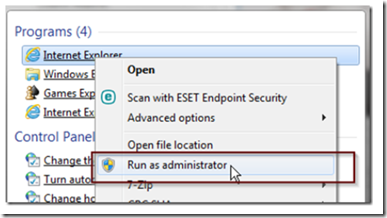
To import an SSL certificate into SharePoint, open explorer as an administrator.
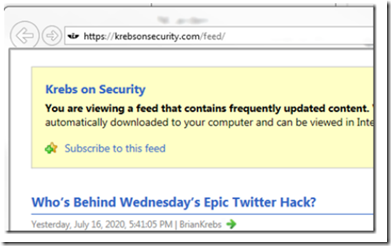
Find the Web site feed you are interested in and navigate to the page.
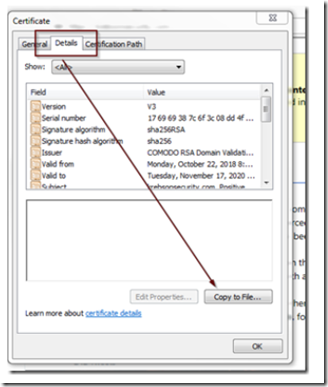
Click on the lock icon to view the certificate.
Go to the certificate details tab and select copy to file.
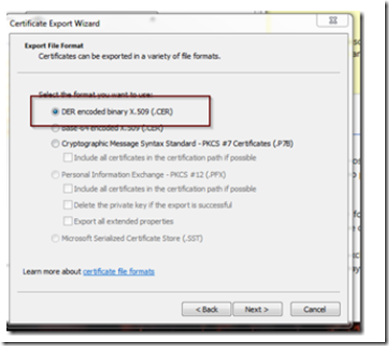
Export the certificate as DER encoded binary X.509.
Give them a friendly name and make sure you have them saved where they are accessible from SP Central Administration.
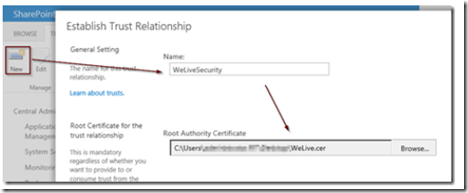
Open SharePoint Central Administration, navigate to Security –> Manage Trust.
Click new, then give your certificate a friendly name and use the browse button to locate the CER file.
Click OK to import it. You can repeat this step for all your web site certificates.
