Dell has some excellent tools to monitor and manage PowerEdge server: Open Manage Server Administrator and Open Manage Server Essentials. Since both these applications rely on the SNMP protocol, here’s a quick SNMP primer. SNMP is composed of three basic components. The agent, the trap and the manager.
- Agent collects server data health from the server it’s on and forwards the information to the trap.
- Trap stores information that is sent to it by several agents.
- Manager collects the information stored in the trap and presents it in the form of reports, alerts, etc.
SNMP Security Notes
Before you start, follow these good practices to make sure that your SNMP installation is secure.
- Make sure you do not use the default public/private SNMP community name.
- Give your SNMP community name a long name that’s hard to figure out.
- Do not open SNMP ports to the public (outside) network.
- Do not enable read/write on the SNMP community rights, use read only.
Open Manage Server Administrator (the agent) is the application that is installed on each physical server and is tasked with monitoring the server and collecting information about its health. This information is then sent to the trap where it is stored. In SNMP parlance this is referred to as the agent.
Open Manage Server Essentials (the manager) is the application that is tasked with collecting information from the trap on a predefined interval. The trap may contain server health information from various servers. The manager also archives this information, produces reports and sends out email alerts. In SNMP parlance this application is referred to as the manager.
Microsoft SNMP Services is configured either as the trap (to collect and store server health data) or as a forwarder (to send the collected data to the trap)
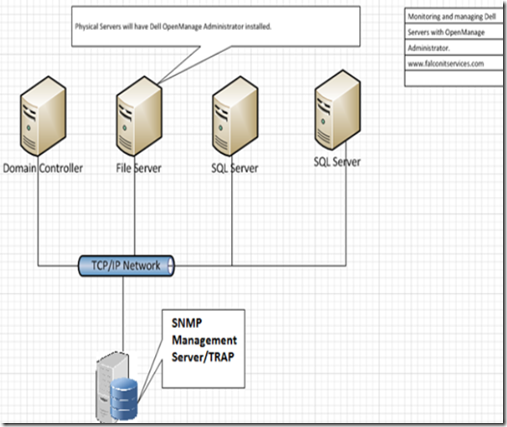
As shown in the diagram below, the server that we designate as the management server will have the Microsoft SNMP trap configuration and the Dell OpenManage Essentials application installed. The servers that we are going to monitor will have the OpenManage Administrator application and the Microsoft SNMP data forwarding configuration.
Installing and Configuring the Management Server (TRAP)
Select the management server that you plan on using as the management station (trap). This can be installed on a separate server or on one of the servers you are managing. It should have moderate processing power and at least 4GB of RAM since the SNMP logs are stored on the included MS SQL Express database. Usually, I configure a virtual server as the management/trap server and install the agents on the physical servers. If you are monitoring a single server, you can install both the manager and the agent on the server.
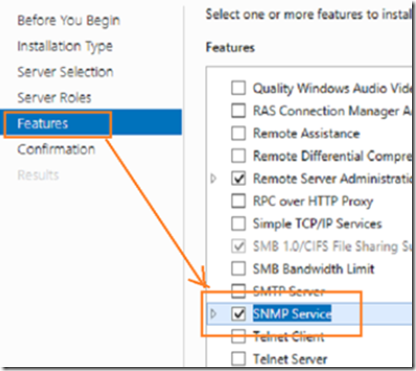
To begin, navigate to the management server’s add roles and features wizard and install the SNMP service from the features selections.
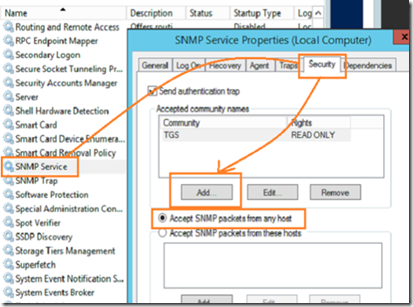
Once the SNMP service is installed, go to the services.msc console, locate the SNMP service, right click and select properties.
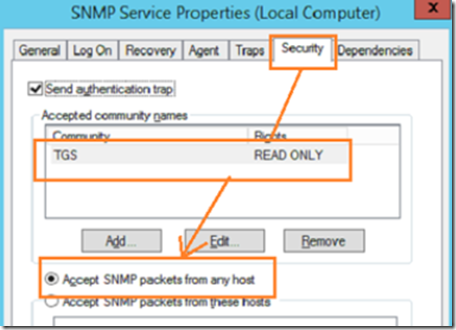
In the security tab, add a community name by clicking on the add button. The default name ‘public’ should be removed and replaced with your own community name. Leaving the default SNMP community name is a security risk.
Next, either select accept SNMP packets from any host or add all the servers that you will be monitoring manually if selecting accept SNMP packets from these hosts. Accepting SNMP packets from any host is less secure however it will avoid you having to enter each SNMP device’s IP address manually. If you have a monitored, secure network, this pretty safe as long as you do not use the default SNMP community name.
The ‘send authentication trap’ checkbox will alert you when an SMTP connection fails due to authentication failure. An authentication failure is when an SNMP enabled device tries to contact the trap using an incorrect community string. This alert is useful because it can help you detect and intruder who may be trying to guess the SNMP community name, but it can also be frustrating because SNMP enabled devices on your network that have the default ‘public’ community name will send periodic SNMP traffic to the trap and trigger the alert. If you enable this feature, make sure to track all the SNMP enabled devices on your network and change the community name to the correct name.
If you receive periodic, hourly or rhythmic SNMP authentication failure notifications, use a network sniffer to track down the SNMP enabled dice and change the community string to match your SNMP community string.
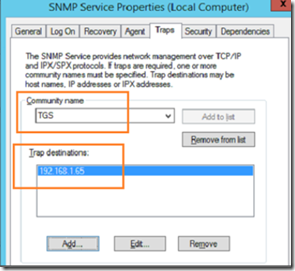
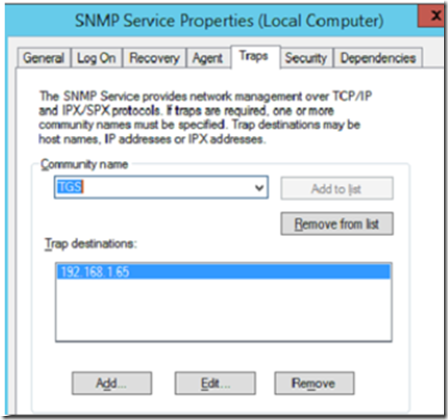
Click on the traps tab and the SNMP community name and management server’s IP address as indicated below.
When finished, restart the server to ensure that the changes take effect.
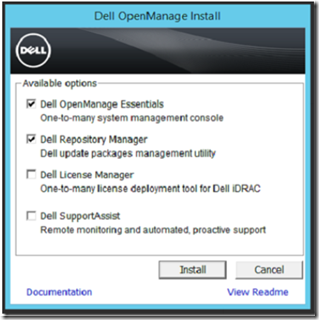
Download OpenManage Server Essentials from the Dell Web site and install it on the management server. Make sure the server’s firewall is disabled.
You may have to proceed with several installations until all the dependencies (such as MS SQL Express) are installed. Once finished, you will be prompted to open Dell OpenManage Essentials and run the first time setup for a quick setup tutorial. Glimpse through it quickly and click finish.
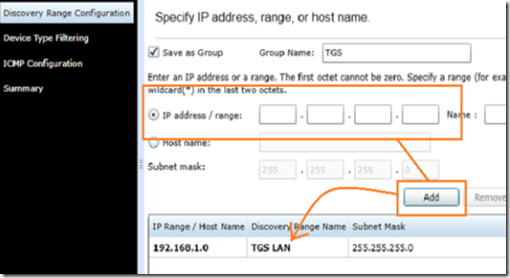
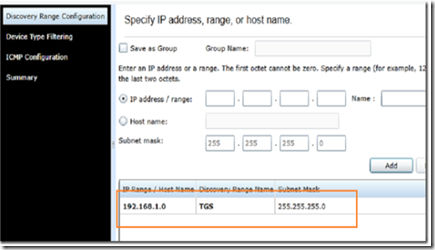
Next, select the IP address subnet/range of your LAN for the discover service which runs periodically based on a schedule.
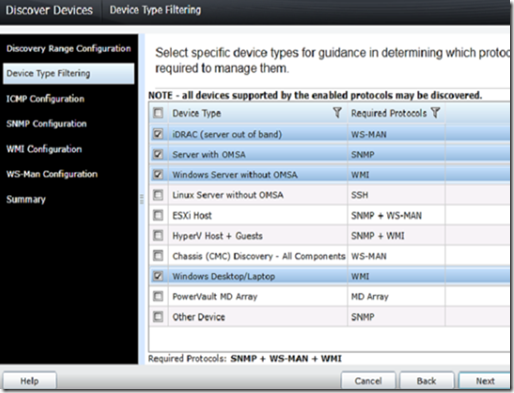
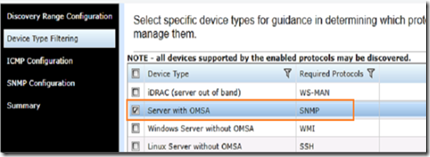
Select the types of devices you want to monitor.
Leave the ICMP (Ping) configurations as the defaults.
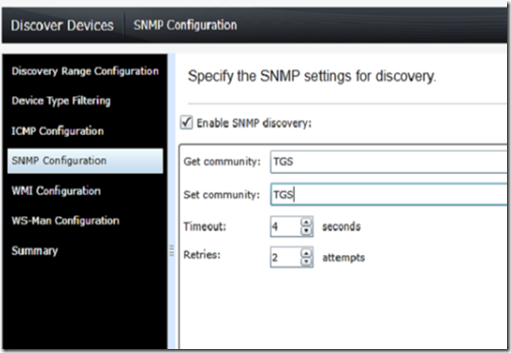
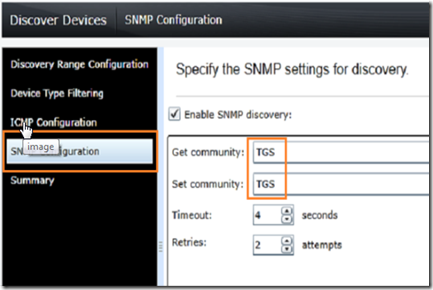
Add the SNMP community name you chose when you configured the SNMP server. Click finish to complete or continue to WMI configuration if you are going to use WMI to monitor workstations.
Installing and Configuring Dell Open Manage Administrator Agent on the Physical Servers
Download and install Dell OpenManage Server Administrator (OMSA). OMSA agent is a sensor tool that gathers server health data and forwards it to the trap server. Several OMSI agents can pass data to the trap server to allow multiple servers to be managed from a single management interface.
Do not install OMSA on virtual server, since virtual server do not have their own separate hardware. Make sure to disable the firewall on the agent/physical server.
Install the SNMP service on the agent server just like you did on the management server. Once the SNMP service is installed, go to services.msc and select the SNMP service properties.
In the security tab, enter the community name and select accept SNMP packets from any host.
Click on the traps tab and enter the community name and enter the MANAGEMENT server’s IP address in the trap destination.
Click OK when finished and restart the SNMP service for the changes to take effect.
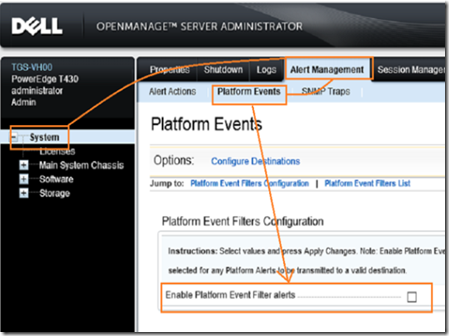
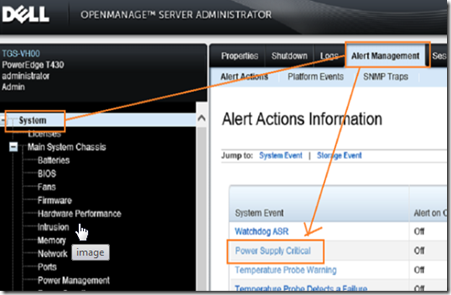
Next, log in to the OMSA browser interface and navigate to system –> alert management –> platform events.
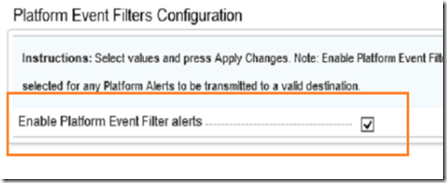
Enable the platform event filter alerts and click apply.
Click on system –> alert management and select a system event to modify.
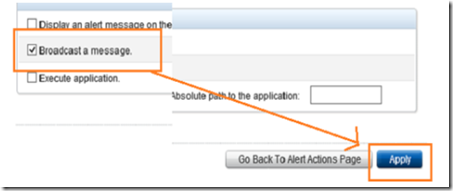
Select broadcast a message and click apply.
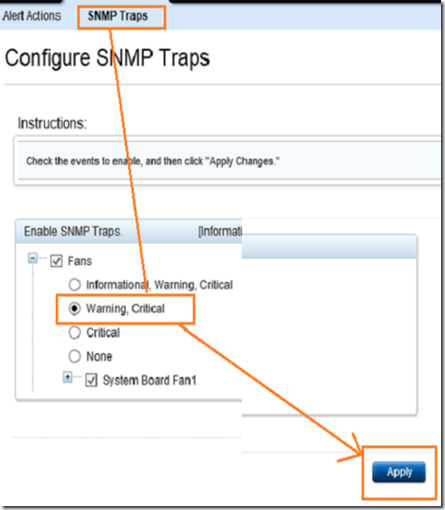
Optionally select SNMP Traps and choose the level of alert monitoring.
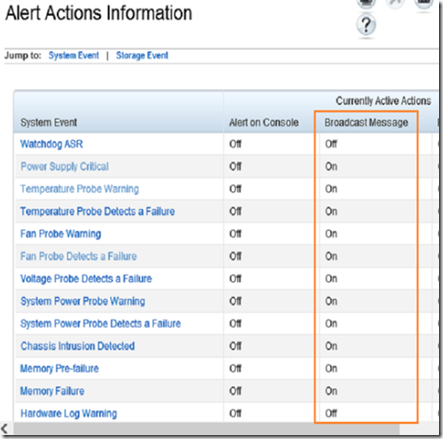
Repeat this process until all the components you want to monitor are enabled for broadcast.
Install Open Manage Administrator agent on all the physical servers in your organization and repeat the above steps on each server in order for all servers to pass the probe alerts to the trap/management server.
Finalize the Open Manage Server Essentials Management/Trap Server
Log back in to the management/trap server and open Dell Open Manage Server Essentials. Select manage –> discovery and inventory –> add discovery range. Add the local subnet to the range configuration.
From the device type filtering select OMSA and click finish.
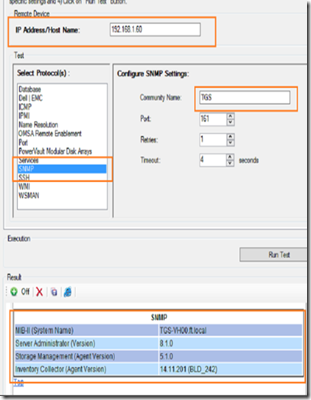
In the SNMP discover, make sure to enter the correct community name.
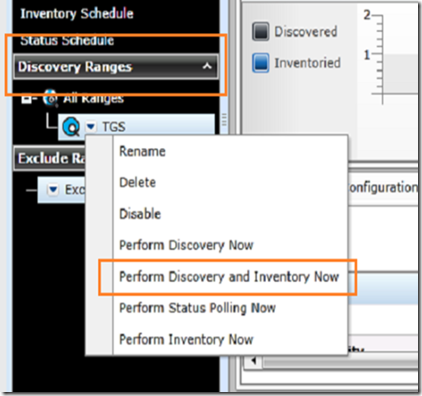
The discovery will run when you click finish. If you saved the discovery, you can set an automatic discovery schedule or manually perform another discovery by selecting discovery ranges –> discovery name –> perform discovery and inventory now.
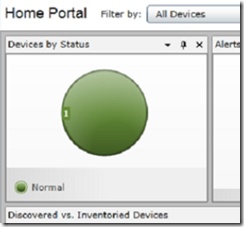
The discovered agents will now appear in the home portal device window along with their status.
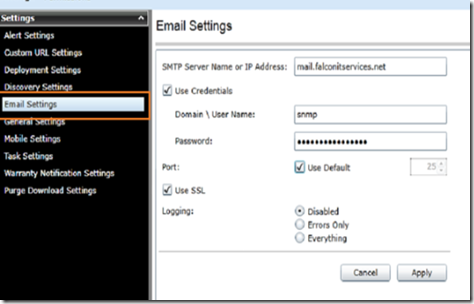
To set up alerts, select settings –> email settings and enter the SMTP server settings that OMSE can use to relay mail.
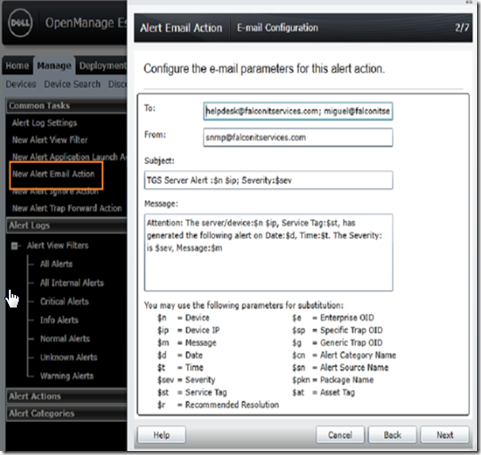
Click on manage –> alerts –> common tasks –> new alert email action. Give your alert a friendly name and fill out the information in the mail configuration section. You may want to edit the message to make it easier to read if you are copying non-technical stakeholders. Separate email addresses using semicolons.
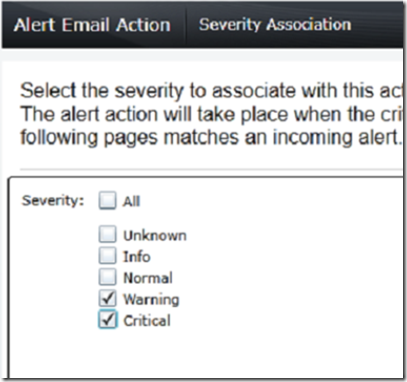
Select the severity, categories and devices for email alert triggers.
Select a limited time/date range for alert categories if applicable (if you don’t want a 4:00am wake up email).
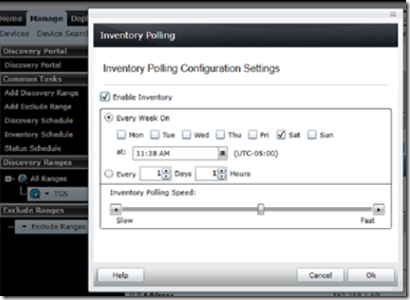
The OpenManage Server Essentials will poll the agents every 60 minutes. You will receive an alert if there is a change in server health in one of the selected categories. You can change the polling interval by selecting manage –> discovery and inventory –> inventory schedule.
If things don’t work as describe here, use the troubleshooting tool to make sure that SNMP is enabled and working on both the management server as well as the agent servers.
Once you have the Open Manage Essentials set up, follow these instructions to configure the servers on your LAN to collect information from Windows Server OS events and pass them to the Open Manage Essentials application.

